Adding products to your WooCommerce store is easier than you might think! Whether you’re starting your very first online shop or adding a few new items to an existing one, WooCommerce’s intuitive platform makes it a breeze to get your products listed, looking great, and ready for sale. Let’s dive in and see how simple it is to get started!
Step 1: Log In to Your WordPress Dashboard
Before you can add any products, you’ll need to log in to your WordPress dashboard. Once you’re in, look for the WooCommerce section on the left-hand sidebar. Don’t be shy, go ahead and click it! You’ll see several options under WooCommerce, including Orders, Coupons, and Settings. The one we’re after right now is Products.
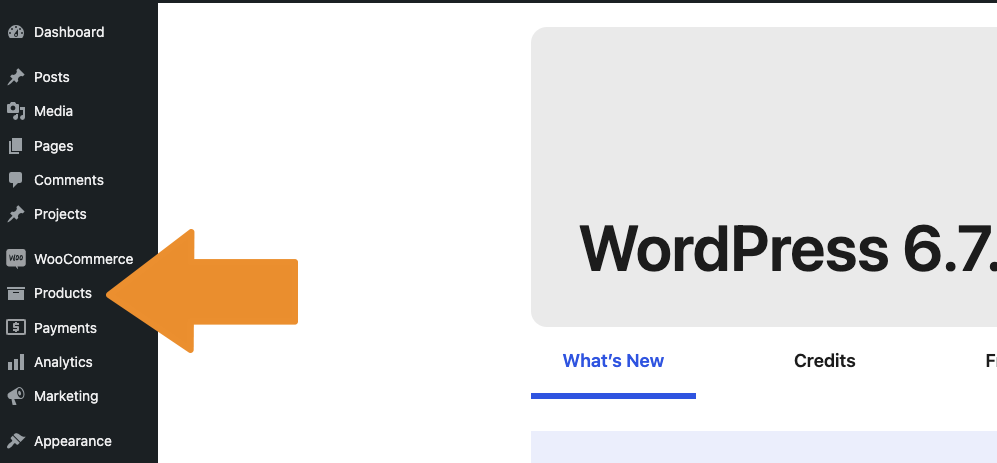
Step 2: Click “Add New Product”
Now that you’re in the “Products” section, you’ll see a button at the top that says Add New. Click on it, and you’ll be taken to a fresh product page where all the magic happens. You can now start filling in all the details about the product you want to sell.
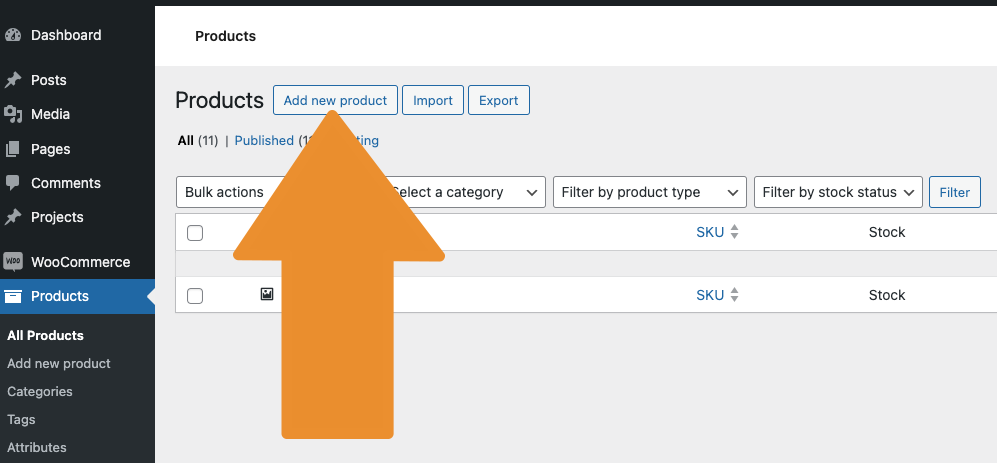
Step 3: Add the Product Name and Description
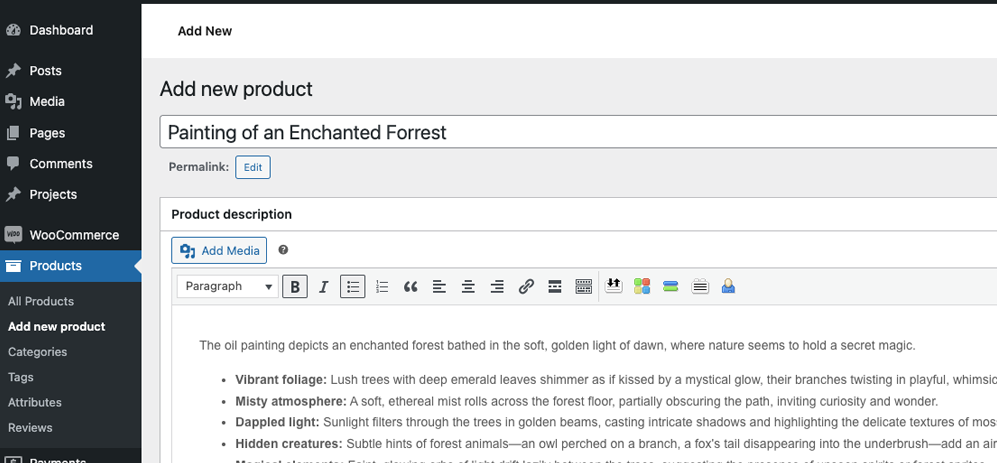
The first thing you’ll want to do is give your product a catchy and clear name. Make it something that instantly tells your customers what it is—no need to get too creative here unless you want to!
Just below the product name, there’s a space for your product description. Here’s your chance to sell your item with words! Make sure to highlight the features, benefits, and anything special about it that will make your customers excited to hit that “Add to Cart” button.
Pro Tip: If you have a lot of information, break it down into bullet points for easy reading. Your customers will thank you for it!
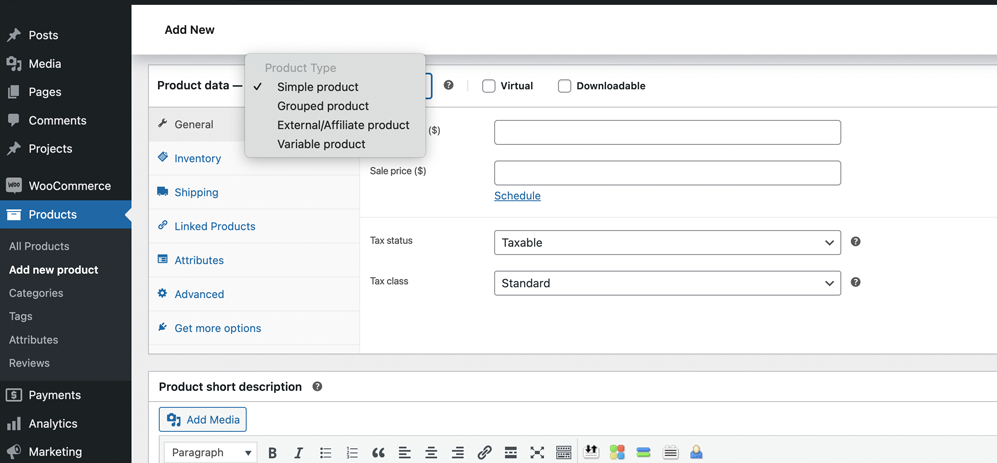
Step 4: Set the Product Type
Here comes the fun part! WooCommerce allows you to add different types of products. Depending on your needs, you can select one of the following:
For now, let’s assume you’re adding a Simple Product—that’s the most common choice for new shop owners. Select that, and we’ll move on to the next step!
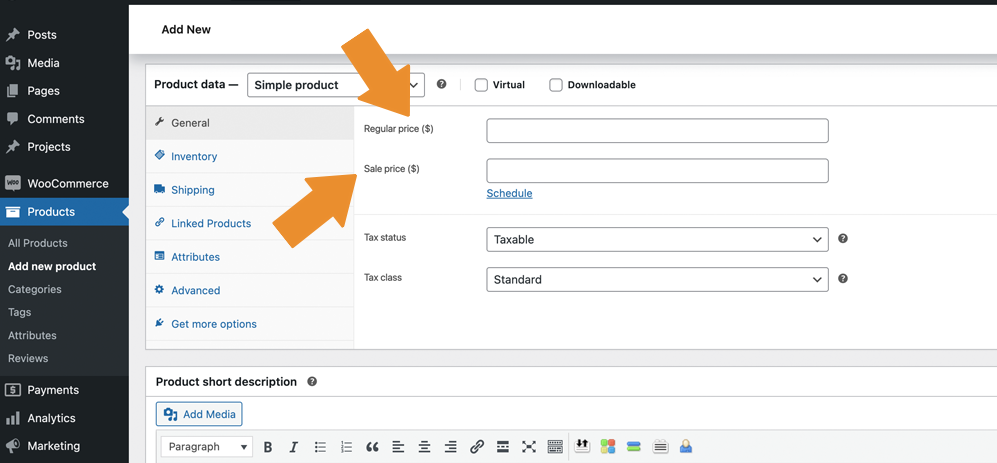
Step 5: Set Your Product Price
Now it’s time to decide how much your product will cost. There are fields for both Regular Price and Sale Price. If you’re feeling generous and want to offer a discount, you can set a sale price to show your customers how much they’re saving.
Don’t forget to make the price visible by selecting the currency that suits your region. WooCommerce makes it easy to change the currency via the settings, so it’s not a big deal if you need to adjust later.
Step 6: Add Product Images
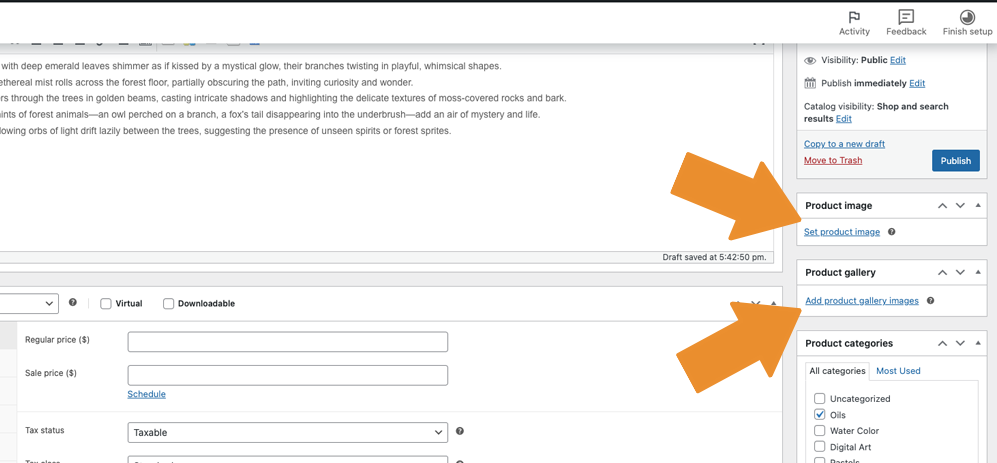
A picture is worth a thousand words, and when it comes to selling online, it’s even more important. Under the Product Image section, you can upload a high-quality image of your product. WooCommerce gives you the option to add multiple images in the Product Gallery, so customers can see different angles or variations of the product.
Make sure your images are clear, bright, and show the product in its best light (literally and figuratively!).
Step 7: Organize Your Product with Categories and Tags
Next, we’ll organize your product to make it easier for customers to find. WooCommerce allows you to create Categories (think of them like product groups) and Tags (specific keywords that help describe your product).
For example, if you’re selling a T-shirt, you might categorize it under Clothing and tag it with words like T-shirt, Cotton, or Summer Fashion. Categories and tags help you keep your store organized and can make products easier to search for.

Step 8: Set Inventory Options
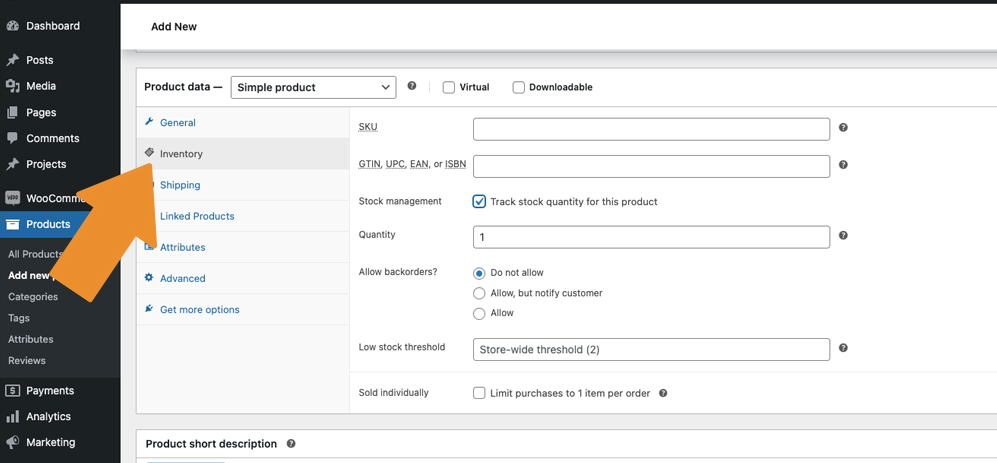
WooCommerce also lets you track your inventory so you never oversell. Under the Inventory section, you can enable stock management, set how many items you have in stock, and WooCommerce will automatically update the inventory when a sale is made.
You can even choose whether you want to allow backorders, or if you want customers to be notified when the product is out of stock. It’s all about flexibility!
Step 9: Add Shipping Information
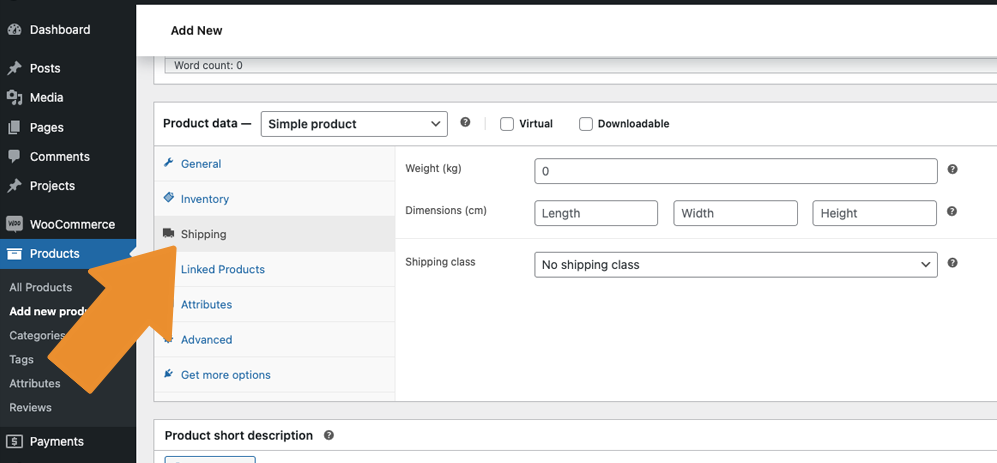
If your product requires shipping (like physical items), now is the time to add the shipping details. Here, you can set the weight and dimensions of the product, which will help WooCommerce calculate shipping costs. You’ll also select a shipping class, which can be helpful if you have multiple types of products with different shipping costs.
Pro Tip: Don’t forget to check your Shipping Zones in the WooCommerce settings to make sure everything is configured properly.
Step 10: Publish Your Product
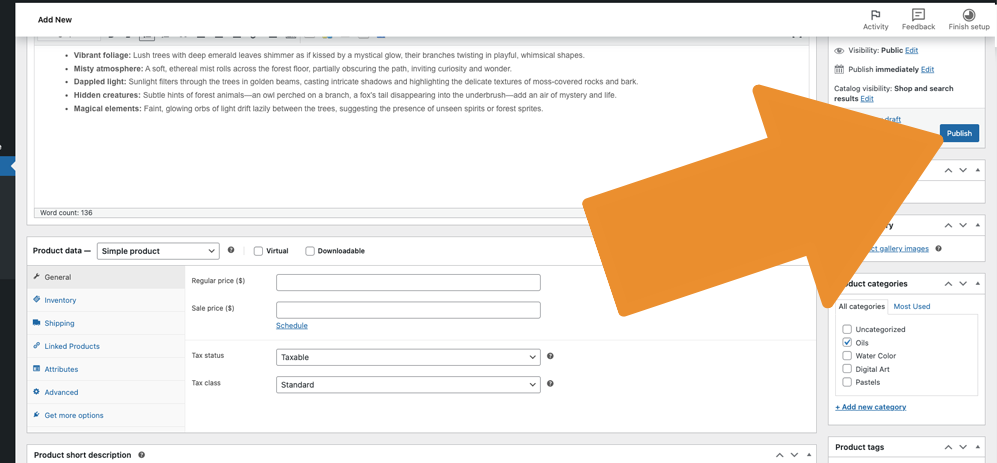
Once you’ve filled in all the details, you’re ready to Publish! Just click that Publish button on the right side of the screen, and voila—your product is live on your store!
You Did It!
See? Adding products to your WooCommerce store is simple and straightforward. In no time, you’ll have a fully stocked store ready to show off to the world. WooCommerce’s user-friendly platform makes it easy to keep everything organized and running smoothly, and with these steps, you’re well on your way to growing your online business.
Remember, it’s always okay to start small and work your way up. Every time you add a new product, you’re one step closer to creating a thriving online shop!
Happy selling! 🚀


